Mindmaps and Outline
Brainstorming is part of planning a project: get the ideas out first, sort them later. Every project has mindmaps for that, each with an outline — Organize — of the same ideas.
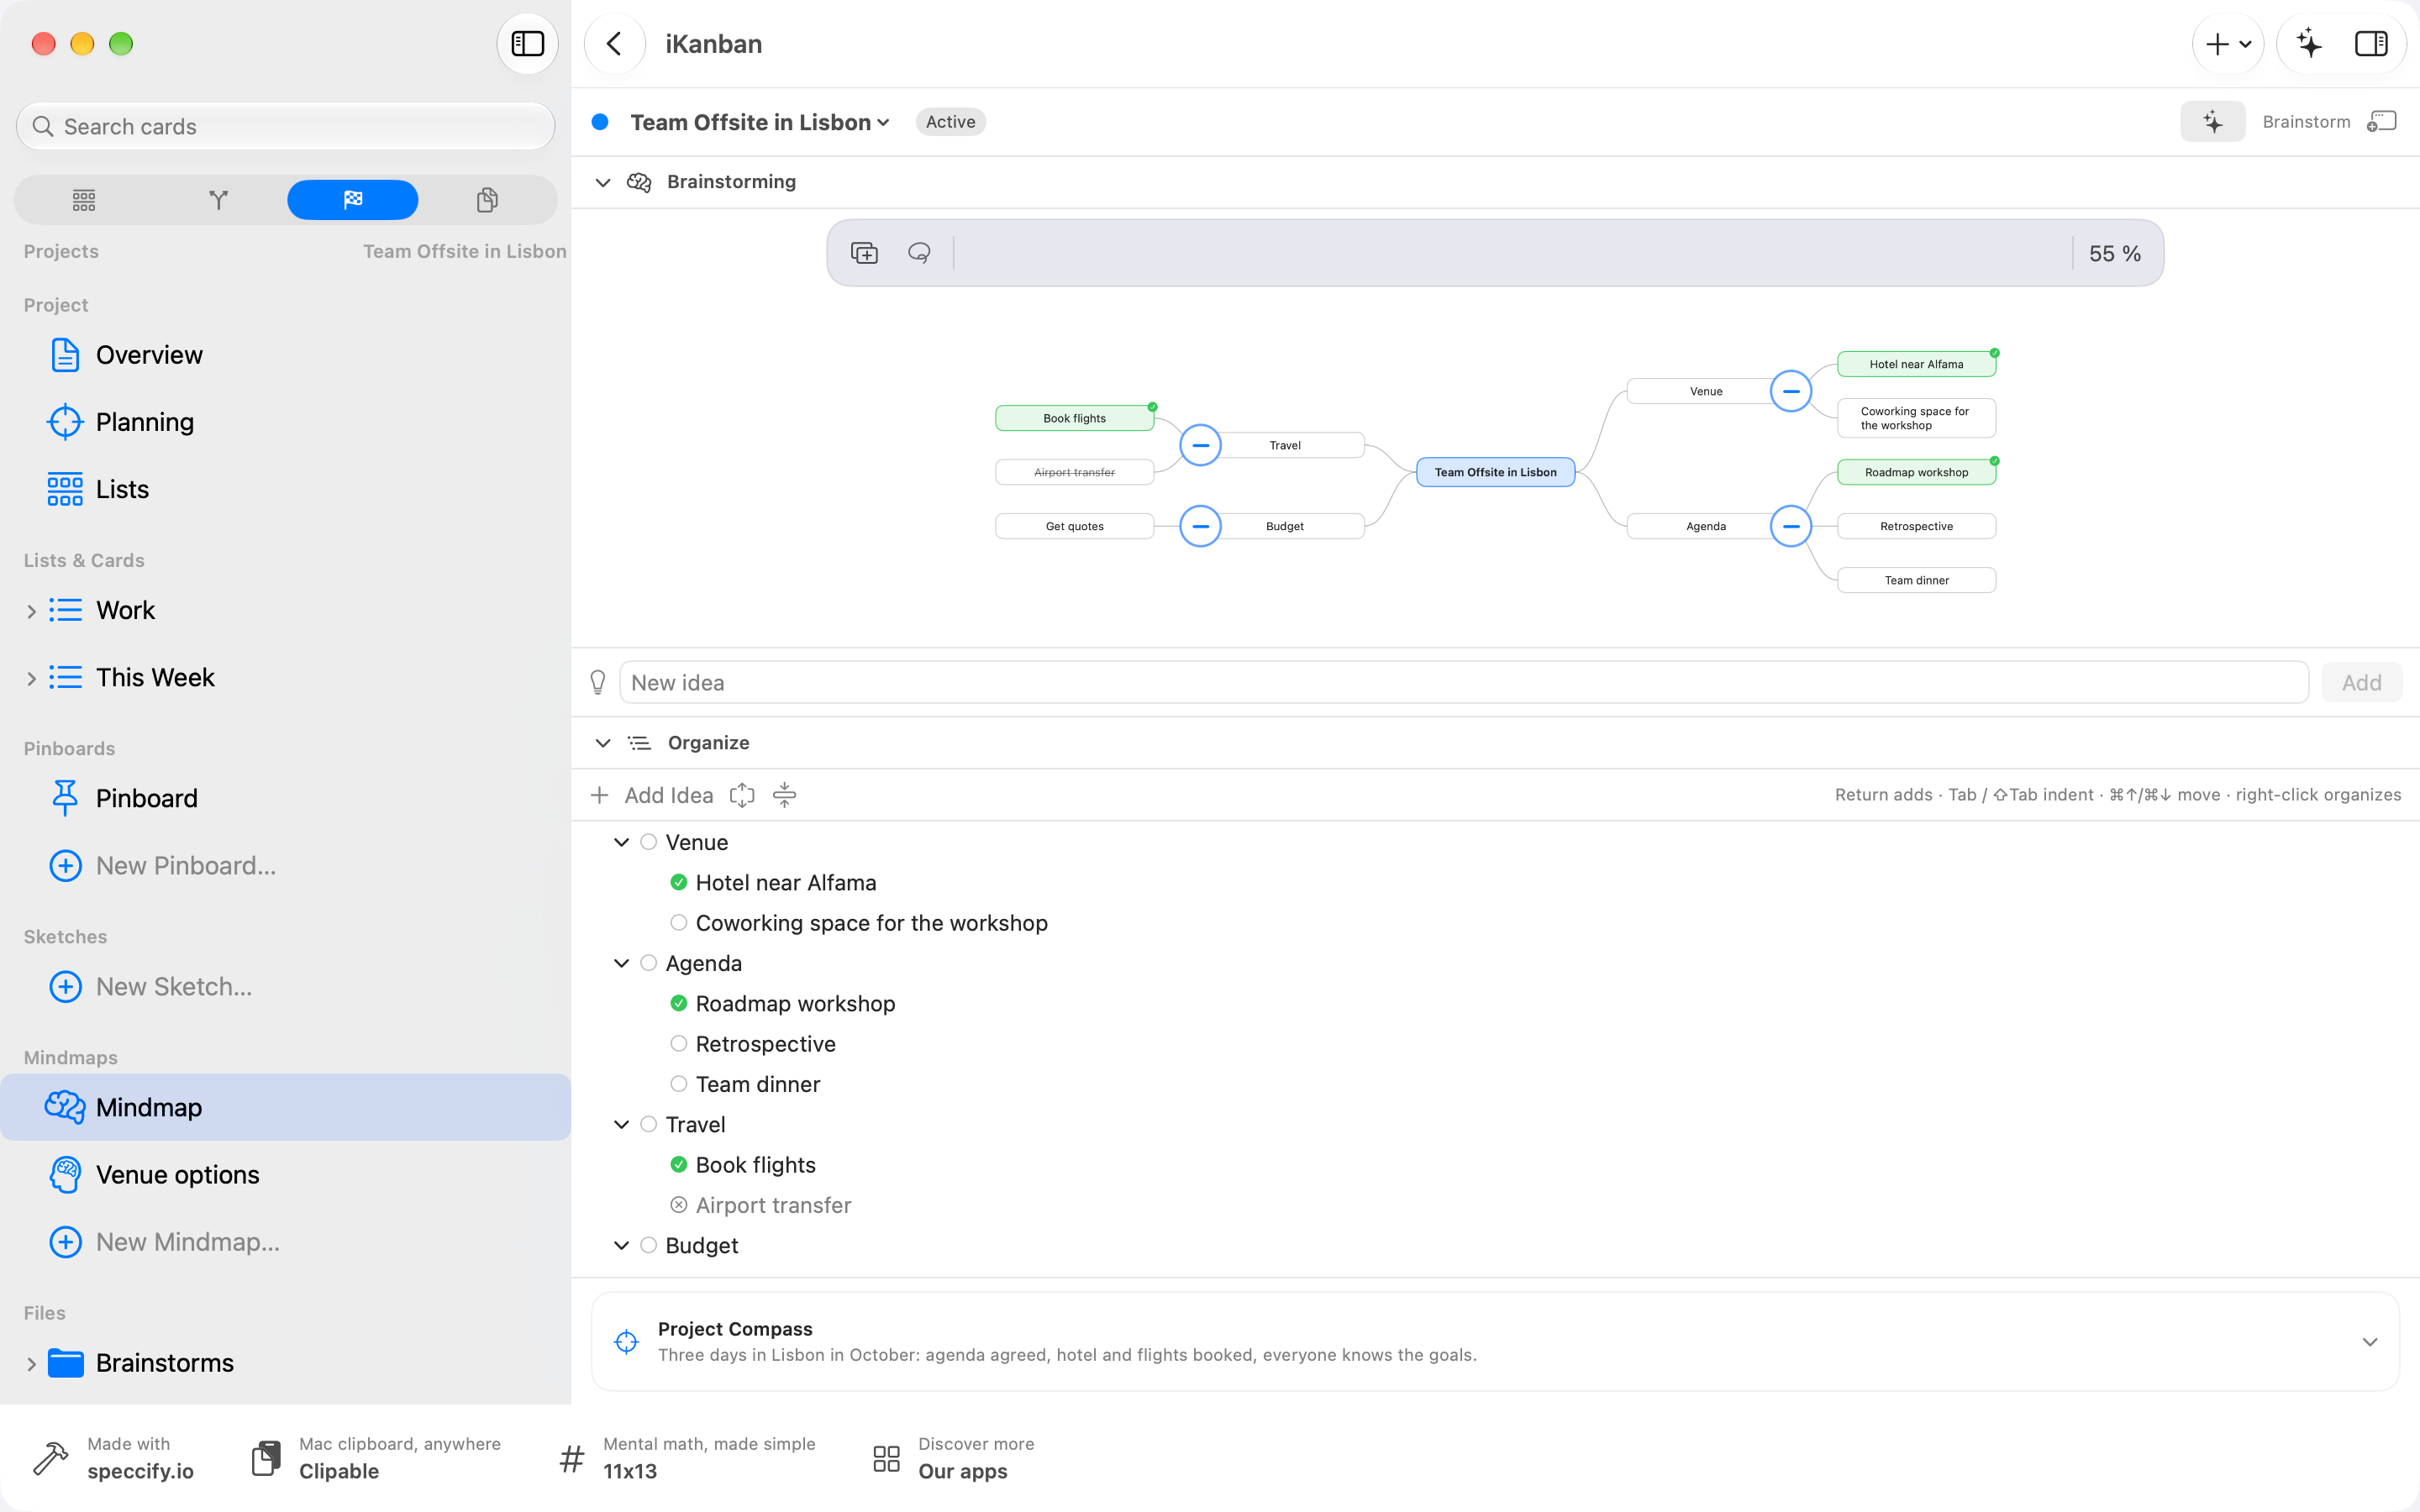
A mindmap opened directly also shows the collapsible Project Compass below the canvas. Purpose, principles, outcome vision and outcome stay within reach. Select a statement for an idea prompt. In Planning › Gather Ideas, work in the mindmap; Planning › Organize shows the same ideas as an outline and adds milestones.
Open or add a mindmap
Section titled “Open or add a mindmap”Open a project and look under Mindmaps in the sidebar. Every project starts with one, called Mindmap. To add another, choose New › New Mindmap… or New Mindmap… at the end of the section, and give it a name. The context menu of an added mindmap offers Rename… and Delete Mindmap.
The project’s name sits in the middle; ideas branch out to both sides.
Add ideas on Mac
Section titled “Add ideas on Mac”- Type into New idea at the bottom and press Return. With an idea selected, the new one goes under it.
- With an idea selected, Tab adds a sub-idea and Return a sibling. The arrow keys move around, ⌫ deletes, Esc clears the selection.
- Double-click an idea to edit its text. Double-click empty space to start a main idea on that side.
- Insert in the toolbar adds a main idea on the left or right, or a sub-idea under the selected idea.
Add ideas on iPad and iPhone
Section titled “Add ideas on iPad and iPhone”The capture field sits at the bottom, above the keyboard, and stays open: type, Return, type, Return.
- Without a selection, a new idea becomes a main idea, on the side with fewer ideas. Double-tap empty space left or right of the center to pick the side yourself.
- Tap an idea to select it. The switch next to the field sets where the next idea goes: Sub-Idea (under the selection) or Same Level (next to it). After each new idea it switches to Same Level, so siblings grow in a row. Level Up selects the parent.
- Double-tap an idea to edit its text in place.
Arrange the map
Section titled “Arrange the map”Drag an idea onto another to move it there with everything below it. Drop it onto the center to make it a main idea.
On iPad and iPhone: you can drag any idea right away; drag empty space to move the map. Drop an idea between two siblings to reorder it — a line shows where it lands.
On Mac: drop an idea onto the left or right half of the center to choose its side, or into the empty area on one side to move its whole branch there. Drop text from anywhere onto an idea to add it as a new idea.
The small button where a branch starts collapses it; a collapsed branch shows how many ideas it holds. Zoom with a pinch, the percentage menu at the right of the toolbar (Fit shows the whole map), or ⌘+ / ⌘− / ⌘0. On iPad and iPhone the switch Mindmap / Organize sits in the toolbar too.
Select several ideas
Section titled “Select several ideas”Tap Select (the lasso next to Insert), then tap ideas to select them. The bar at the bottom offers Adopt, Discard and Delete for all of them; deleting an idea also deletes its sub-ideas. Done ends the selection.
Undo and Redo in the toolbar reverse and reapply grouped edits from the current editing session. Adopt here only changes the ideas’ status. To create a card, use Next Action… as described below.
Organize: the outline
Section titled “Organize: the outline”When you open a mindmap directly from the sidebar, these views apply: Organize shows the same ideas as an indented list. On Mac: the mindmap and Organize are two halves of the view; the chevron in each header collapses one. On iPad and iPhone: they are separate views — switch with Mindmap and Organize at the top. On a wide iPad, Both shows them side by side.
In the outline, Return adds a sibling. With a keyboard, Tab and ⇧Tab indent and outdent, ⌘↑ / ⌘↓ move a line, ⌥← / ⌥→ collapse and expand, and ⌫ in an empty line deletes it. Drag a line onto another to nest it, or onto its top or bottom edge to place it before or after. The context menu also offers Indent, Outdent, Move Up and Move Down.
Turn ideas into cards and lists
Section titled “Turn ideas into cards and lists”Select one idea, then choose Next Action…. Write the next concrete physical step, choose a list belonging to this project and tap Create Action. The idea is marked adopted only after the card saves successfully. If the project has no list, create one or assign an existing list first.
The context menu and inspector offer additional options:
- Make Card on › a list of the project creates a card with the idea’s text.
- Make New List creates a list in the project’s area color and assigns it to the project.
- Discard strikes the idea through; Restore brings it back.
Ideas that became a card or list turn green with a checkmark. Adopted and discarded ideas stay in the map — the thinking remains part of the plan.
Pin a mindmap to a pinboard
Section titled “Pin a mindmap to a pinboard”Drag the mindmap from the sidebar onto a pinboard, or choose Pin to … from its context menu. On the pinboard itself, Insert › Mindmap does the same. The pinboard shows a live miniature — see Pinboards.